Does Apple M1 Mac Support Roblox VR? & Can You Play Roblox VR On Apple Mac M1?
Here’s The Simple Answer To All Your Burning Questions + How To Play Roblox VR On Your M1 Mac Tutorial!
Ever since we uploaded & Published the “[MAC] How To Play Roblox VR On Oculus Quest 1 & 2 With MAC” video, we have gotten hundreds of comments regarding, “Does Roblox VR Support M1 Mac?”, “Can I play Roblox VR On My Mac with M1 processor?” etc etc…
So we decided to make this post, to clarify all the questions that you guys were asking us & to provide a Step-by-Step tutorial on How To Play Roblox VR On Your Apple M1 Mac!
If there are any additional questions then make sure to drop them in the comments section, which will serve as a “Resource Section” for others too…
I know you are excited, so without wasting any time, let’s answer the questions first and then move on with the tutorial.
Does Apple M1 Mac Support Roblox VR? & Can You Play Roblox VR On Mac With M1 Chip?
The answer is Yes, you can play Roblox VR On Your Apple M1 Mac because your MacBook is powered by Apple’s very own M1 chip which is a full 8-core GPU and it can power through even the most intensive work or gaming.
Also, your MAC has a dedicated USB C thunderbolt port that fits perfectly for the Oculus Link cable
But you can’t use Bootcamp Assistant as we did previously…
The reason your M1 Mac doesn’t support Bootcamp assistant is that Bootcamp assistant requires a Mac with an Intel processor…
Fortunately, there’s a simple workaround that we have found; So Keep reading to know how you can play Roblox VR On Your Apple M1 Mac.
Here’s How To Play Roblox In VR On Your M1 Apple Mac:
*NOTE*: Graphic-intensive games like Boneworks or Half-Life Alyx would be tough to run as those games don’t support macOS directly like windows 10 and SteamVR.
And also, this is a relatively new piece of technology that only Apple produces.
For additional information, rumours have it that Apple has made this M1 chip keeping VR in mind. So when Apple decides to launch their official VR headset then that headset will run on the M1 chip perfectly.
STEP 1: Install Windows 10 On M1 Mac
So, we have found a software that will help you install Windows 10 on your M1 Mac without using Bootcamp Assistant (see the embedded video above). It also includes a 14-day free trial, so you don’t need to pay anything upfront
The software that we will use is called Parallels, which will install Windows 10 on your Mac with minimal effort and then you’ll be able to install Steam VR and other software required to play Roblox in VR.
Just keep in mind to give your windows 10 enough resources to power through while playing Roblox VR games on your Mac while you’re in the configuration process of setting up Windows 10 using Parallels.
And yeah, this software doesn’t have any Viruses & it won’t harm your Mac.
STEP 2: Install The Necessary Softwares On Your Windows 10
After making the Windows partition, it’s time to download the softwares required to play Roblox VR On your Mac.
Here are the list of softwares that you need to download:
After downloading all the softwares, make sure to login into your existing accounts.
STEP 3: Setup Oculus Link
Next, it’s time to set up the “Oculus Link” so that your Quest can act as a PCVR headset On Your Apple M1 MAC.
Oculus Link enables Quest 1 & 2 owners to play Roblox VR games with a VR-ready PC to use their Quest as a Rift.
Using Oculus Link for Roblox VR is incredibly easy. First, make sure you have a Compatible Link Cable and that your Quest and the Oculus app are updated to the latest version.
You can connect your Oculus link with the quest in just 5 easy steps that will take you 5 to 10 minutes or less to set up the Oculus link.
Here’s the Best & Affordable Oculus Link Cable Alternative: Syntech Link Cable 16 FT Compatible with Quest2
Step 4: Connect Your Oculus Quest Headset & Enable Oculus Link
First, Make Sure that in the Oculus App, You Have “Unknown Sources” Turned On. Here’s how to do that:
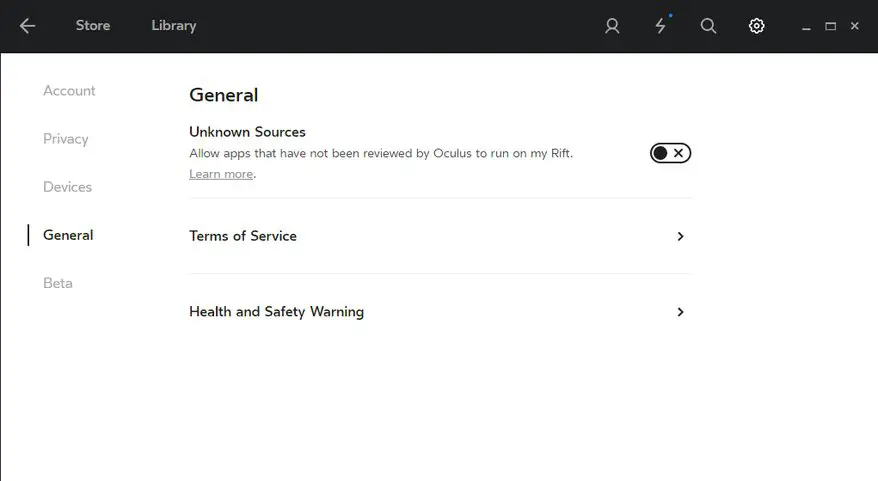
- Open the Oculus app on your computer.
- Select Gear Settings and select General in the left panel
- Now, toggle the Unknown Sources setting instead of an X (Refer To The Image)
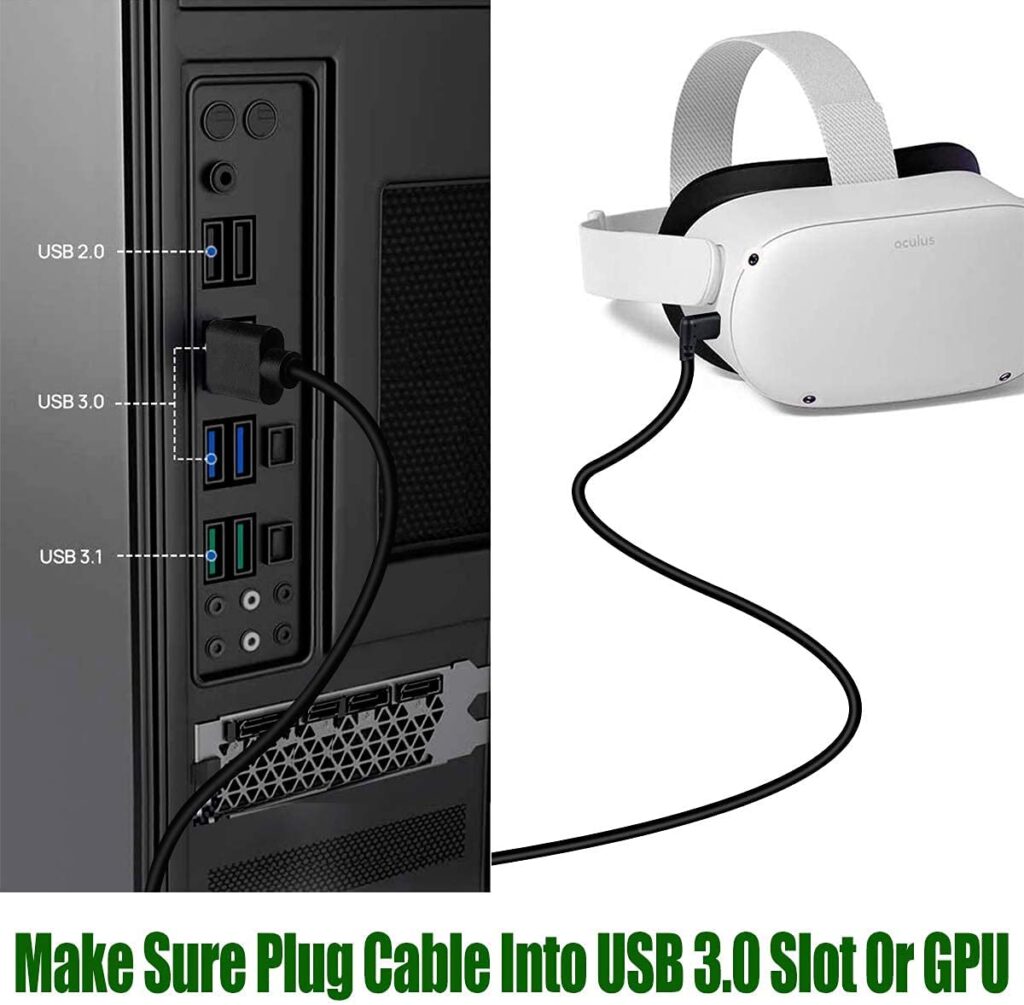
Now, Get ready and turn on your Meta quest and prepare your Oculus Link cable. The USB C end will go into your oculus quest headset, and the other USB C end will go into the USB C port on your MAC.
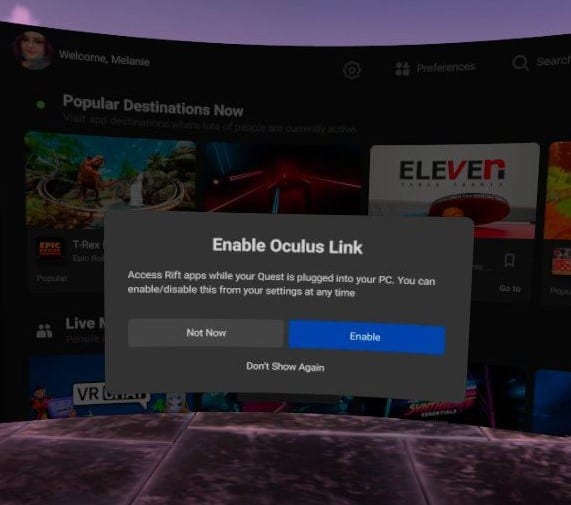
If you did all of that, quickly peek into your oculus quest and make sure you enable the “Enable Oculus Link” pop up
Step 5: Select Your Desired Roblox VR Game
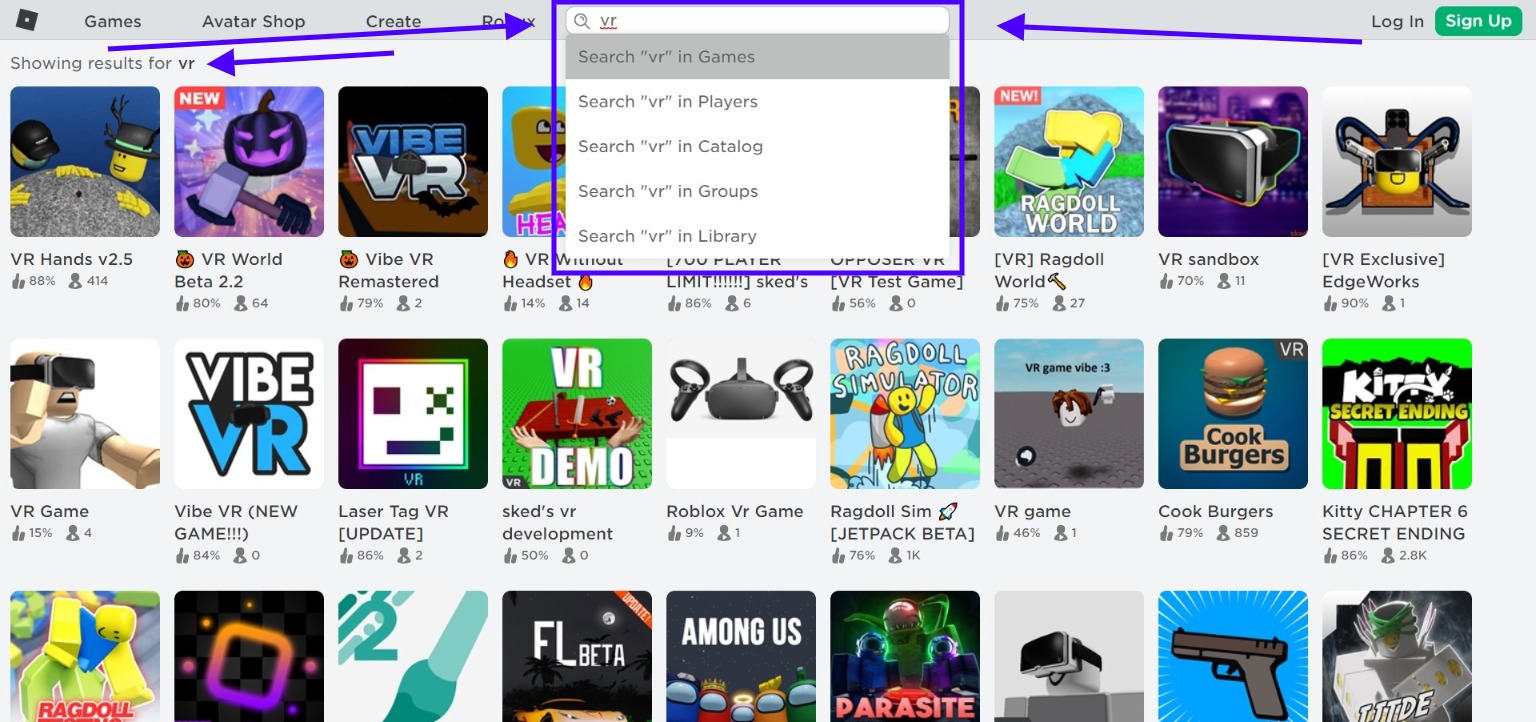
Now, Open the Roblox website and search “VR” in the Search bar. After that, you can see a lot of games that will appear on your Apple Mac or should I say Windows 10? (ahhh, it’s so confusing…lol…).
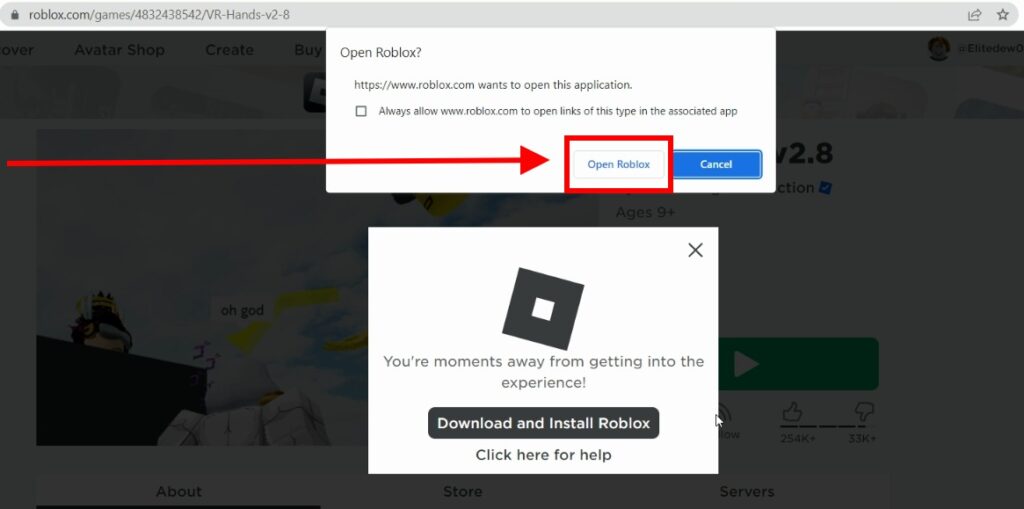
Select your preferred Roblox VR Game And hit the “GREEN PLAY BUTTON”
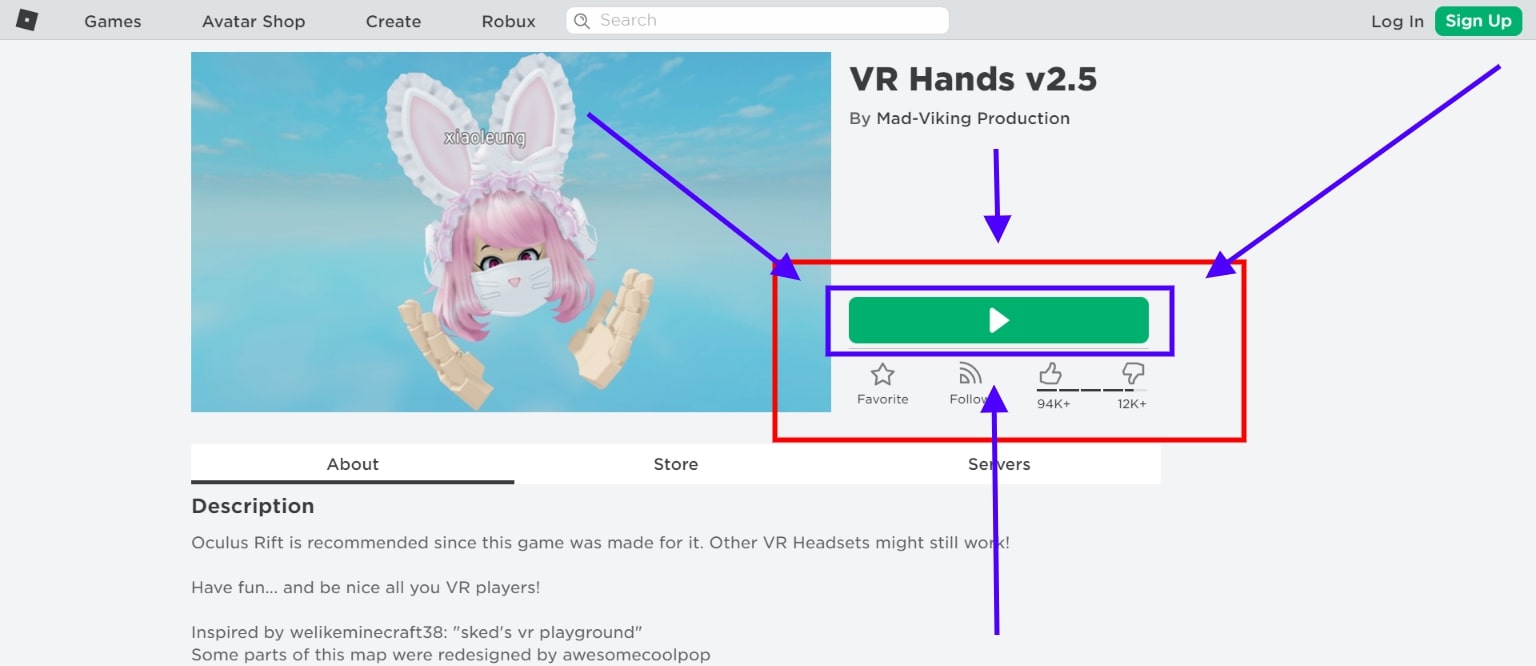
A pop will appear in your browser, click “Open Roblox”
Step 6: Playing Roblox In VR!
Put on your Oculus Quest headset while you are waiting for the Roblox App to open on your MAC.
You don’t need to enable the “VR MODE” like we need to do previously as it will automatically detect your VR Headset.
Also, You can’t play Roblox VR on your Oculus Quest with Oculus Air Link & Virtual Desktop.
Because currently, Roblox VR only supports PCVR headsets and Oculus Link makes Our Quest act as a PCVR headset :0).
Read Next:
How To Download & Wirelessly Install Custom Beat Saber Songs On Quest 1 & 2
So there you have it! That’s how you play Roblox VR On The Oculus Quest 1 & 2 on Apple’s macOS With M1 Chip.
Once you have everything set up, please let us know how it goes and we will be more than happy to help you out with any issues you might have.
Our guide is super easy to follow and will get you playing in no time. Have you tried out this method yet?
Let us know how it went in the comments below or on our YouTube channel.
Thanks for reading, Until Then STAY STRONG VR ARMY!


